3. Configuration process
Note
Objective of this chapter is to show how to add necessary data that allows set up connection between DNN and Active Directory.
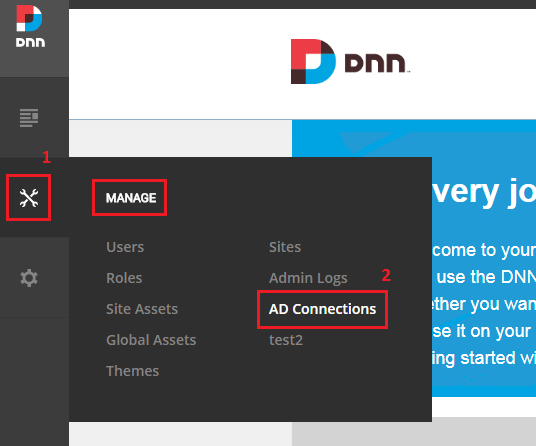
- Navigate to page where ‘Connection Manager’ module is located. In our case it’s ‘Admin-> AD Connections’ page, see figure below.
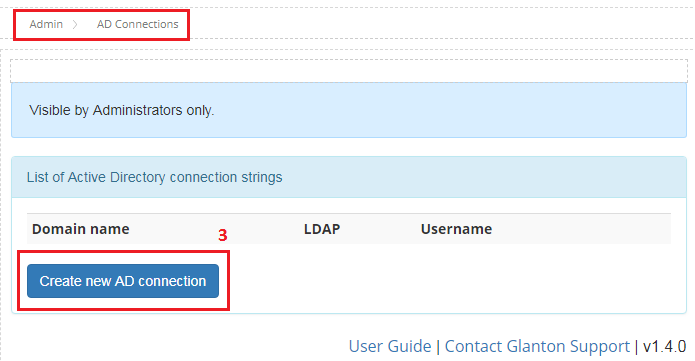
- For now connection list is empty. It’s time to define first connction. Click on button ‘Create new AD connection’, see figure below.
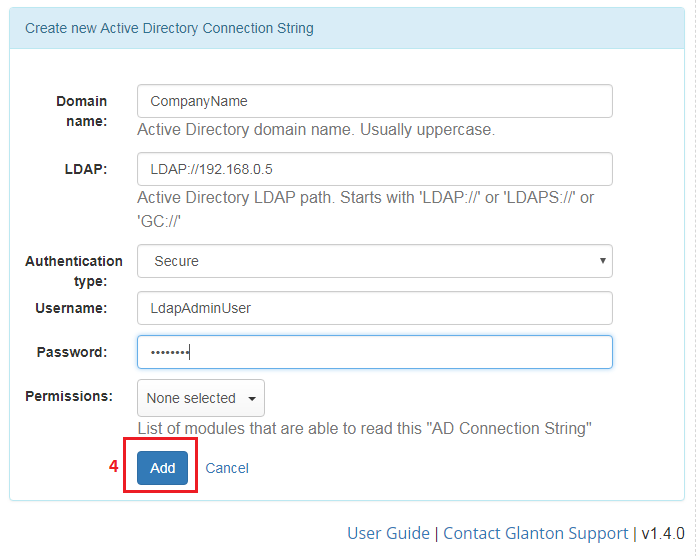
- Into the form from figure below following data needs to be set.
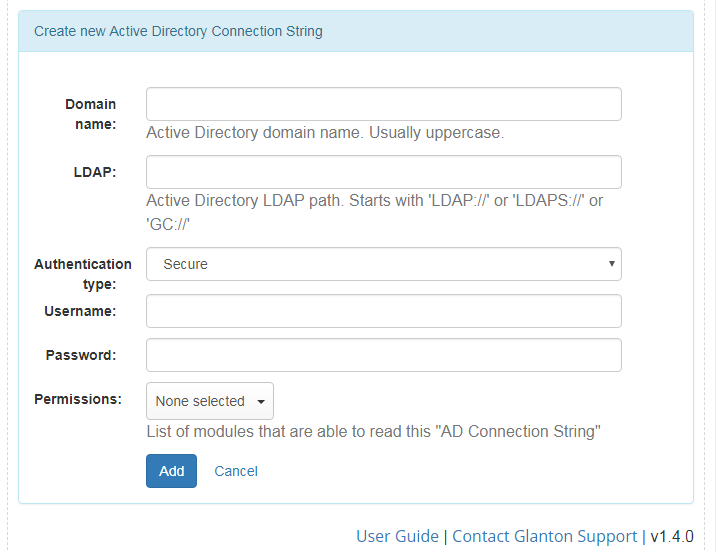
- Domain - it’s a name of Active Directory domain.
- LDAP - it could be an IP address like:
LDAP://192.168.0.5or domain name like:LDAP://dc=myCompany,dc=com. By default LDAP protocol is using TCP and UDP port 389, or on port 636 for LDAPS. Please make sure that these ports are opened in AD firewall and accessible for DNN website. Ask your Active Directory administrator for the details. For more info about LDAP see here and or here. - Authentication Type - type of authentication that will be used to set up connection, by default set it to Secure.
- Username - name of Active Directory user in behalf of which connection to AD will be set. It could be simple AD user, but he needs to have privileges to read other users profile.
- Password - password that belongs to user above. Password will be stored in database as an encrypted string.
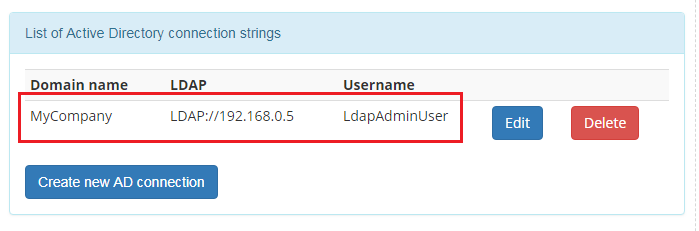
- If all data are in place, click button ‘Add’, this will save your connection in database. Below figure with sample data.
- At the end you should have defined new connection. Please note that for now it’s not visible for ‘AD-Pro Authentication’ module, to make it working you need set correct permissions, see chapter Connection permissions.