3. Product Activation
Objective
Show how to apply license and activate “Salesforce Authentication SPI” plugin. Before you read this chapter please get familiar with Licensing policy, where general licensing rules are described.
Product activation consist of three steps: obtain “Install Key”, generate “License Key”, and final “Activation”.
3.1. Obtain Install Key
To get the “Install Key” follow steps below:
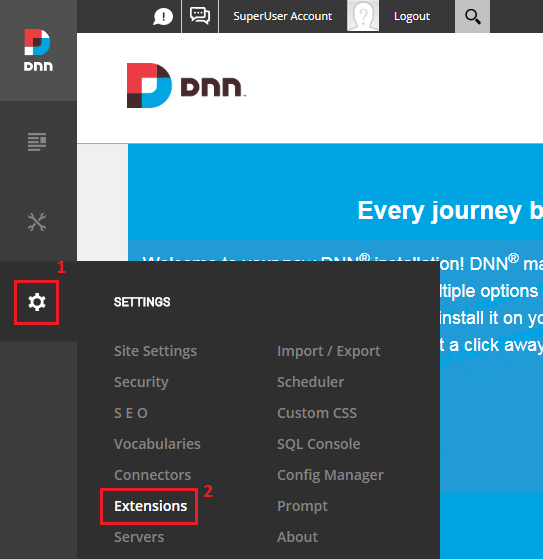
Sign in to the DNN website as a “DNN Host”.
Go to the “Extensions” menu, see figure below.
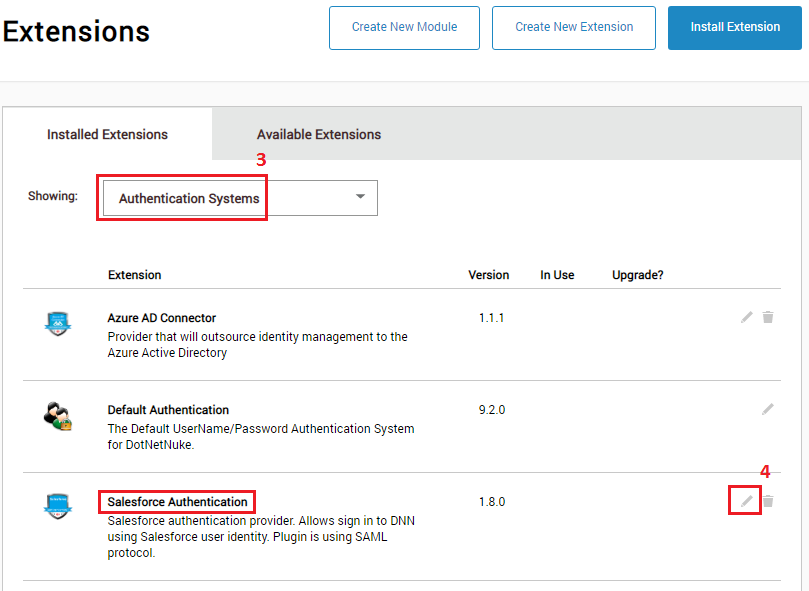
From the extensions category list select “Authentication Systems”, then click on pencil icon near the “Salesforce Authentication SPI”, see figure below.
Select “Site Settings” tab, where configuration panel exist with all settings for “Salesforce Authentication SPI” plugin, see figure below.
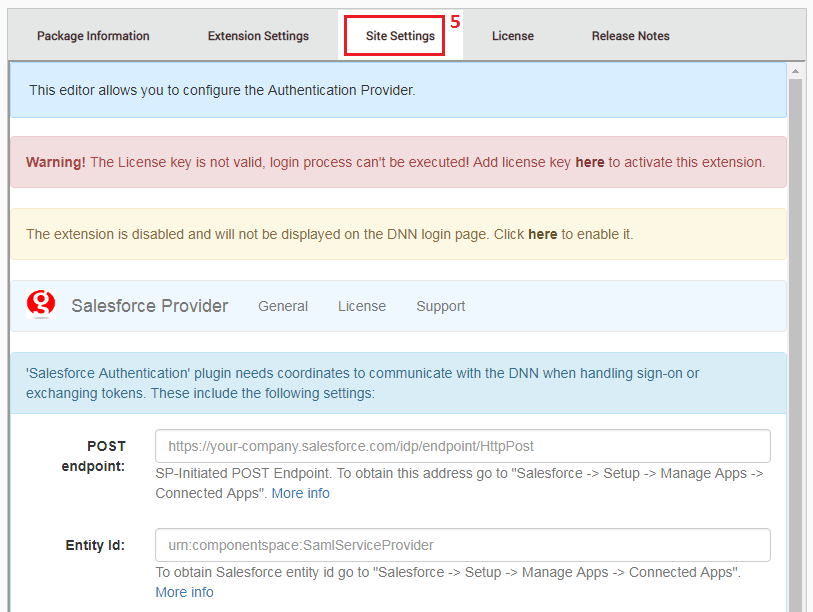
Click on “License” tab, and copy “Install Key” string. Each DNN website has unique “Install Key”.
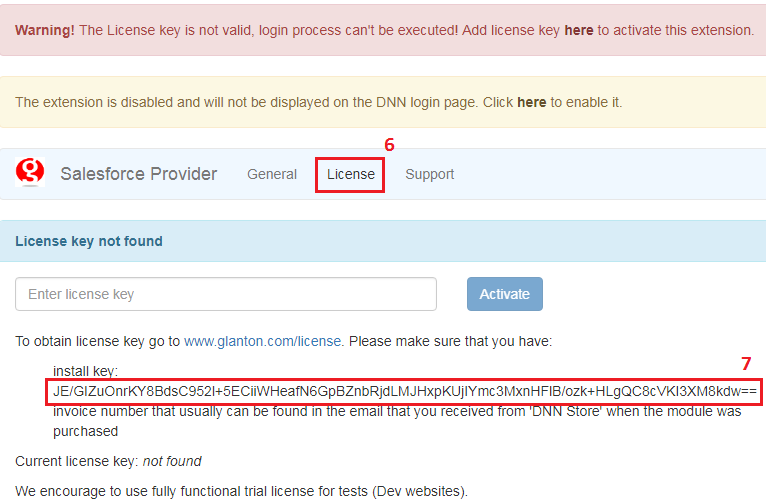
Now when you have “Install Key” it’s time to obtain “Licesne key”, what is described in section below.
3.2. Obtain License Key
When you have “Install Key” it’s time to create “License Key”. Please remember that you will also need your invoice number.
Open page with License form, see figure below.
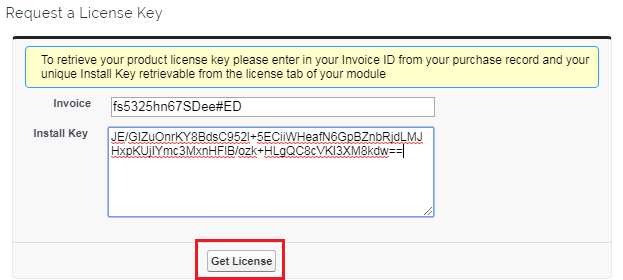
Enter your unique “Install Key” and “Invoice number”, then click on “Get License” button.
This will genarate new “License Key” for your product, copy that license string.
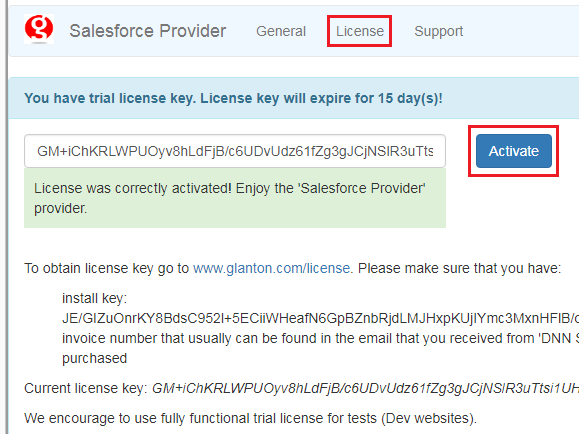
3.3. Activate
When you have “License Key” it’s time to activate “Salesforce Authentication SPI” provider. Go to the “Salesforce Authentication SPI” settings panel, and click on license tab. Paste the “License key” and click “Activate” button, extension should be ready to use, see figure below.